
Mastering Vehicle Wraps: Tips for a Flawless Finish and Long-Lasting Results
Vehicle wraps have grown from a niche marketing tool to a mainstream way of transforming cars, trucks, and even buses. Whether you’re promoting a business, customizing your personal ride, or just craving a fresh look, a high-quality wrap can make a massive impact. But let’s be honest—installing and maintaining a vehicle wrap isn’t as simple as slapping a sticker on your car. There’s an art and science to it, and if you overlook key steps, the results can fall flat fast.
Why Proper Preparation Makes All the Difference
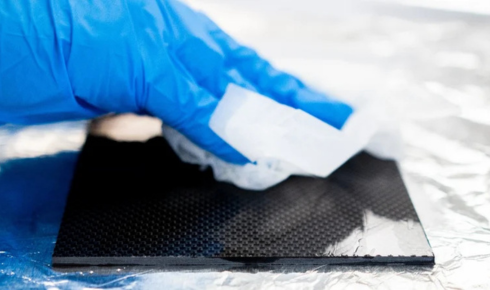
It all starts with preparation. Think of it as the foundation of a house: if you rush through this step, the rest of your wrap is going to struggle. Before any vinyl touches the vehicle, surfaces must be clean, dry, and free from oils, dust, or other residues. Even tiny imperfections can cause bubbles, peeling, or uneven textures. This is where adhesive cleanup becomes critical—removing old glue or sticky residues ensures the new wrap adheres smoothly and lasts for years. Many DIY enthusiasts skip this step, only to regret it when corners start lifting in just a few months.
Surface prep isn’t glamorous, but it’s worth the time. A clean, smooth canvas allows the wrap to conform to curves and edges, giving your vehicle a seamless, professional look. Experienced installers often spend hours meticulously cleaning every nook and cranny—because in the end, that effort pays off tenfold.
Choosing the Right Vinyl and Color Options
Next comes selecting the vinyl itself. Not all wraps are created equal. Premium materials provide durability, better flexibility around curves, and resistance to fading. If your vehicle is exposed to harsh sunlight or extreme temperatures, opting for high-quality vinyl can prevent peeling and discoloration down the line.
Colors and finishes also matter. Glossy finishes scream “attention-grabbing,” while matte or satin can lend a sleek, understated vibe. Whatever your choice, understanding how light interacts with the wrap will help you visualize the final outcome. Remember, it’s not just about looks—it’s about how the wrap wears over time.
Installation Techniques for a Seamless Look
Installing a wrap is where skill truly shows. Professionals use tools like squeegees, heat guns, and precision knives, carefully stretching the vinyl over complex curves and recesses. Applying heat helps the material conform, but it’s a delicate balance. Too much heat can damage the wrap or even the paint underneath. That’s why many installers emphasize low-heat removal methods when adjusting or repositioning vinyl—preventing surface damage while still achieving a tight, wrinkle-free application.
For complex vehicles with multiple panels, careful planning is crucial. Starting from the center and working outward, overlapping seams slightly, and trimming edges precisely are all part of creating that flawless, custom appearance. Rushing this process is a surefire way to end up with unsightly wrinkles or misaligned graphics.
Maintenance and Longevity Tips
Once your wrap is on, maintenance becomes the next priority. Unlike traditional paint, wraps can be vulnerable to scratches, harsh chemicals, and prolonged sun exposure. Gentle washing with a soft cloth and mild soap is usually enough. Pressure washers? Use caution—keep the nozzle at a safe distance to avoid peeling edges.
One often overlooked aspect is factory finish preservation. A good wrap protects the underlying paint from UV rays, minor dings, and road debris. This means that when you eventually remove the wrap, your car could look as close to showroom condition as possible. For businesses, this dual benefit—branding today, preservation for resale tomorrow—makes wraps an appealing investment.
Removing and Replacing Wraps Safely
Eventually, all wraps reach the end of their life. Removing vinyl is an art in itself. Pulling too quickly or without proper heat can leave adhesive residue or even peel paint. Instead, take your time, apply heat strategically, and use the right solvents to lift stubborn adhesive without damaging the underlying surface. This careful approach ensures the vehicle is ready for a new design or simply retains its pristine finish.
Final Thoughts: Balancing Style and Care
Vehicle wraps are a fantastic way to express style, promote a brand, or protect your car. But achieving a professional, long-lasting result isn’t about luck—it’s about preparation, material choice, installation technique, and ongoing care. Paying attention to details like adhesive cleanup, low-heat removal, and factory finish preservation makes all the difference between a wrap that wows and one that disappoints.
So whether you’re a business owner looking to turn your fleet into a mobile billboard or an enthusiast wanting a fresh look for your personal ride, investing in quality and expertise is key. Remember: a wrap is only as good as the care you put into it—from start to finish.